J2ME/Java Phone Trial Guide

Installation Instructions

From the mobile phone web browser type http://drop5.cloware.com/downloads/java.jar and press enter. Or
Click Java.jar to download the jar file from the PC and transfer to the mobile phone through Bluetooth.

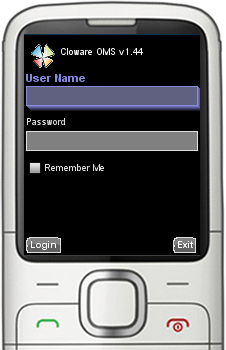
When the installation is complete, launch the application (in some mobile phones the installed application can be found under Games section as MeapEx)

Keyboards and Keys

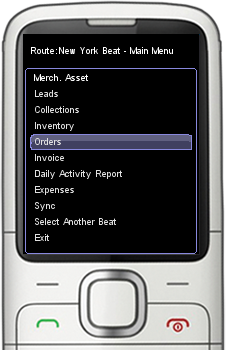
Cloware Order Management Mobile application uses consistent key combination to make the learning curve easier and intuitive.

Login Screen

This application needs authentication to use subsequent pages. You must have a valid Cloware ID associated with your instance of Order Management Service to use this application.
  • Provide your Cloware ID under user name input box (for demo application use salesrep1@outlook.com)
  • Provide your Cloware Password under password input box (for demo application use 1234)
  • Press Left Function Key (found under Login button near display screen's bottom left )
When you login very first time, the application will try to connect to the server to synchronize and download data. You mobile phone will ask you for permission to connect to the internet and download data, you must confirm this (please note this confirmation message box is shown by the underlying mobile operating system and may not follow Cloware function key convention).
You must tap the Left Function key when the synchronization is completed to reach the main menu.
For the demo user we have enabled all the modules and added some data, it will take a while to complete the sync, please wait.

Main Menu

The main menu option list is automatically built from the Modules assigned to the user (refer to user scope to understand the module assignment to user)
Following modules have been assigned to demo user
  • Orders
  • Collections
  • Leads
  • DAR
  • Inventory
  • Expense Tracker
  • Asset Tracker
  • Invoice

Only one route/beat has been assigned to the demo user and that is automatically selected (if there were more than one, user would have been presented with a screen asking them to choose the route). The currently selected route/beat is displayed at the top the screen.

Orders

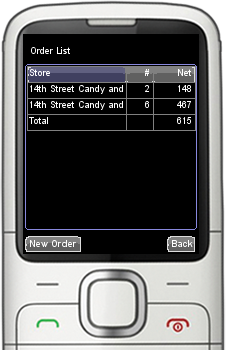
The list of orders booked by you or the orders you are entitled to view/modify will appear in a grid widget. To book a new order press the left function key. To view/edit an order booked earlier, you can use the navigation keys to highlite and press center key

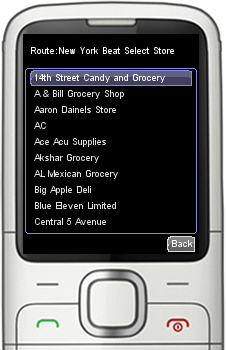
To book (capture) an order against a store (outlet, retail shop), you must select the store first. The list of outlets mapped to the current Route (beat) will be preseneted in the screen. Use nvaigation keys to highlite a store and press center key to select the store. For retail outlets and restaurants placing repeat orders, this list will not be displayed!

Once selected the application remembers the choice and the same store will be used (highlited) for subsequent operations like collection, invoice, merchandizing etc.

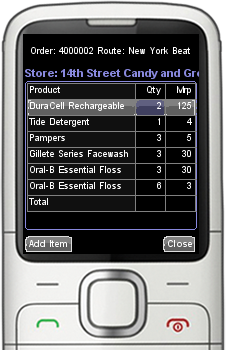
Based on the purchase pattern of the store, the application lists the most probable products (SKUs) that they will buy this time, in a grid with suggested quantites. Highlite the quantity cell (using navigation keys) and start typing the numbers (use the # key or backspace key in the phone (if available) to erase the already entered number ). When the order is complete just press the center key and the application will save the order changes to the phone (the data is not uploaded to the server at this point, you have to press sync in the Main Menu to send the order details to the server)

Simply mark the quantity to 0 to remove an item from the order. To add new item press left function key and select the list of items to add

Customize

The elements that appear in this page/screen can be customized by changing the settings in the server
  • When booking order, the sales rep can capture an additional number per item (like free quantites, return quantities etc), Select "Use Free Quantity" check box in settings screen
  • You may disable prepopulating new order page with suggested orders section in settings screen
  • Simple one at a time item filling order screen can be used by disabling "Grid based Order Capture" in settings screen
  • By default the order date is taken to be current date, however if you decide to leave that choice to the sales rep enable "Edit Order Date" in settings screen
  • By default the SKU price is decided by the system (based on location and master price), if you decide to let the sales rep alter the SKU price enable "Edit Order Price" in settings screen
  • You may capture additional information like "order type" (ex: party order, bulk order etc) by enabling "Order Type" and additionally a free flow information by enabling "Order Information" in settings screen. This will appear as input boxes in the order capture page in the mobile device application.
  • SKUs are selected from a simple list by default. If you prefer, a heirarchy based, drill-down like selection can be enabled by using "SKU selection" in settings screen
  • Number of orders per outlet per day can be restricted to one by selectin "One Order Per Outlet" in settings screen. This option will result in order edit page instead of create page when the sales rep tries to book second order for the same outlet the same day.
  • If you donot want the sales rep to edit orders once created and uploaded, disable "Edit Orders" in settings screen.
  • The decimal (floating point) numbers are not used for product prices by default (results in better performance in lower end devices), it can be enabled b using "Display Decimals" in settings screen.
Additional customization options are available in the settings page (and a description is also available along side).
For another very powerfull feature, refer to "Order Allocation" section in the settings page, that allows you to distribute one order to multiple distributors based on the category of the product ordered


About
The Service
Our customers
Follow us on Facebook
Follow us on Twitter
Follow us on LinkedIn
Product Info
Pricing model
View Demo
Prerequisites
Affiliates
Partnership Program
Partner Kit
Support
Online Forum
Contact us
Terms of Service
Privacy Policy